Build your first Downstream Model!
In this section you will train your first Downstream Model.
In this exercise, we will focus on Propensity model which is a multi-label classification task.
Step 1 - Creating Downstream Task
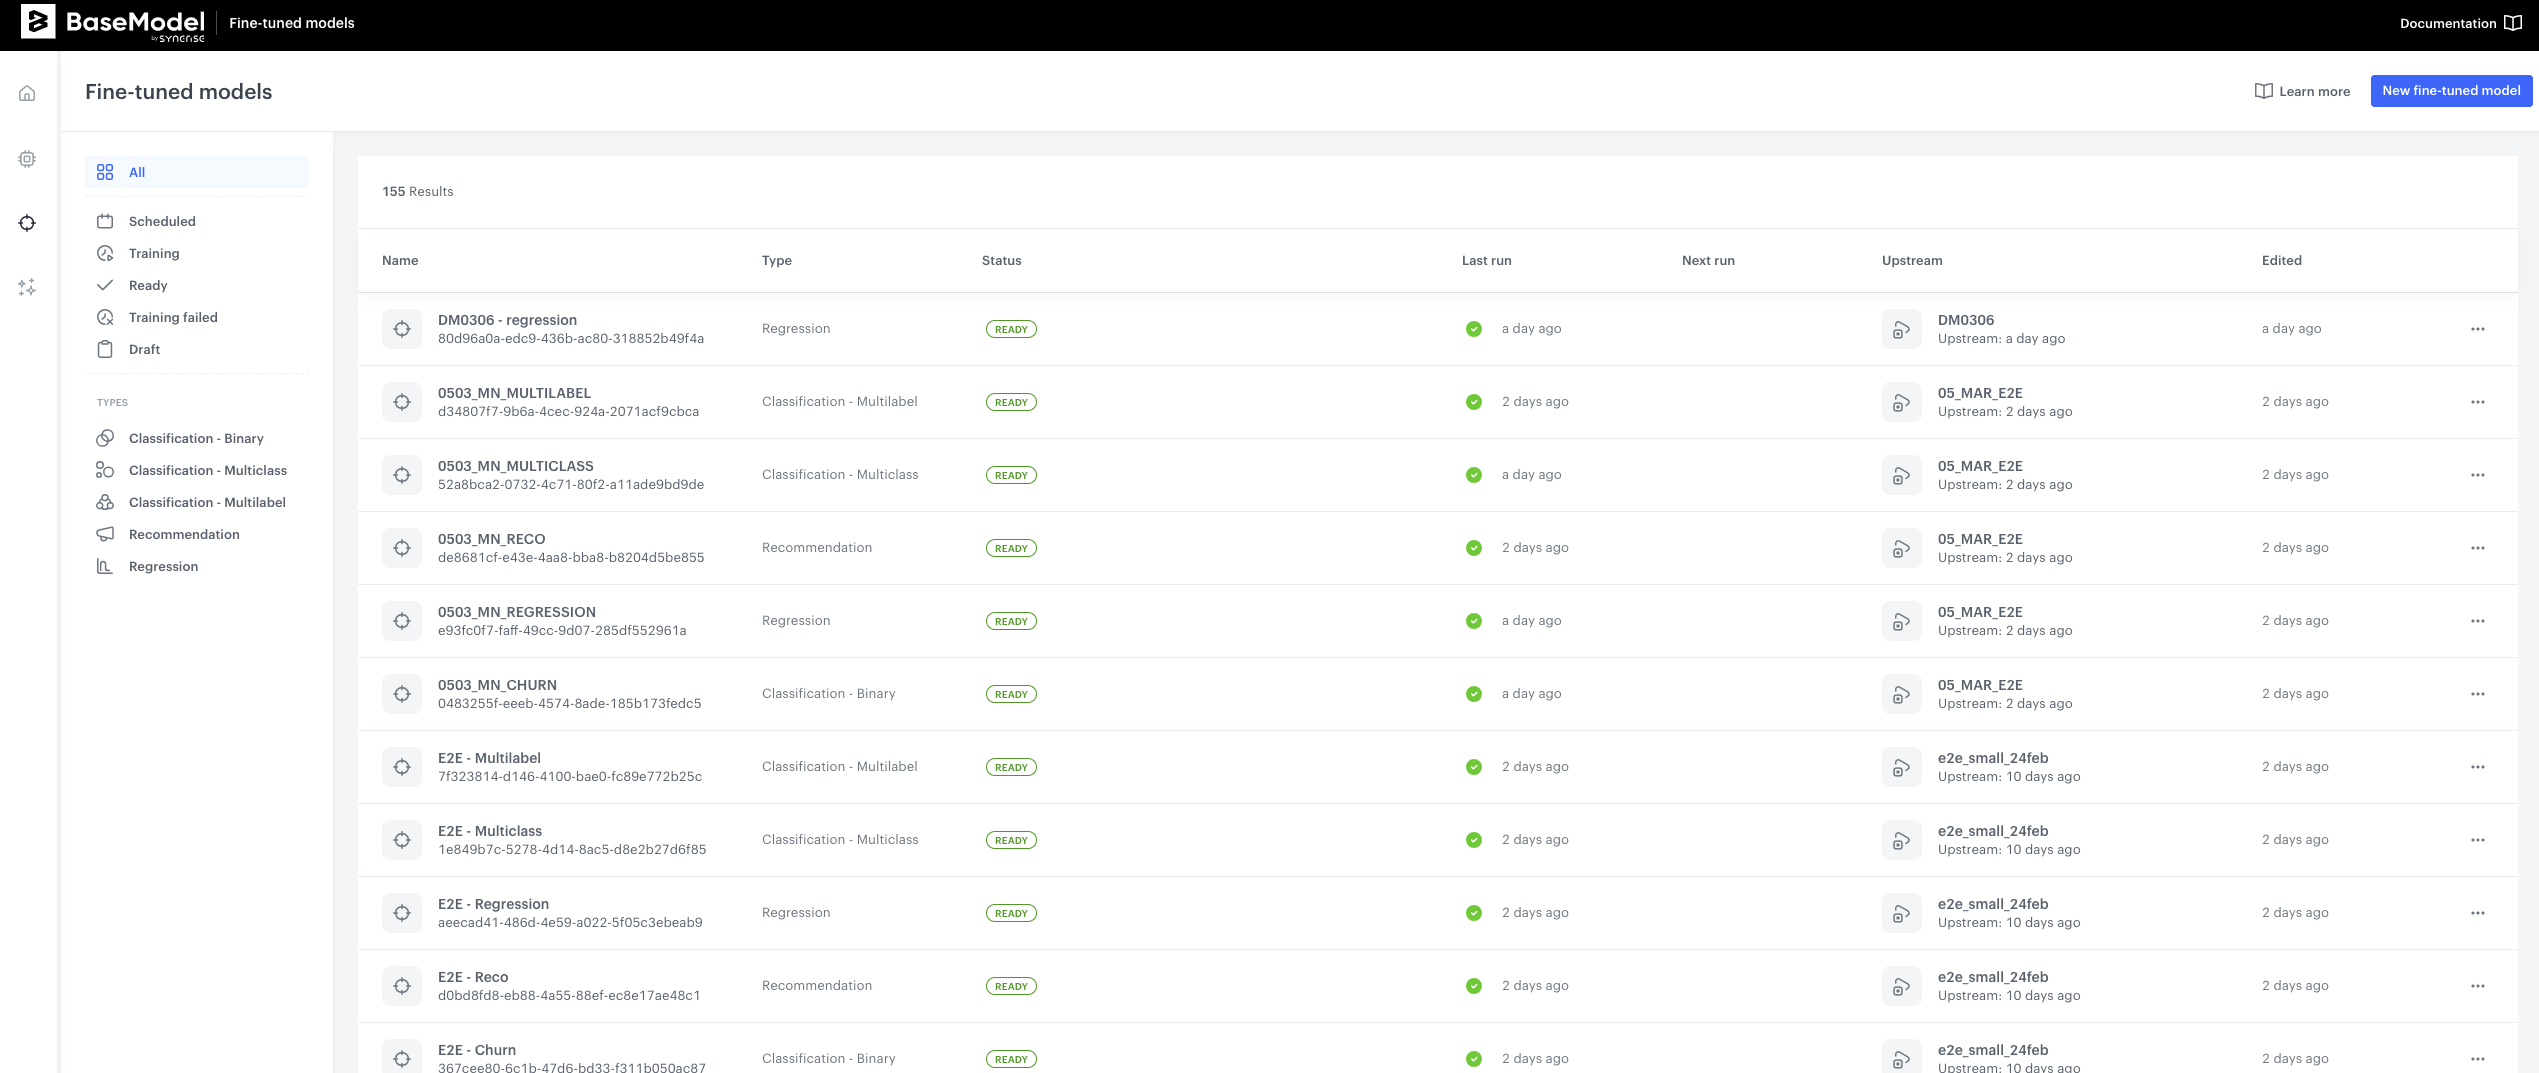
Once you navigate to Downstream Models after you log into BaseModel, you will see a listing of all models created so far. More details about this screen and navigation can be found here.
- Navigate to
New Downstream Modelbutton on the upper right hand side corner, and click it. You will now see an interface with a few building blocks: - Foundation Model - where you will select the Foundation Model to use
- Target Function- where you will define what the model should predict
- Training Audience - where you will be able to limit the entities the model will be using for downstream task
- Training Schedule - where you will define when the training shall commence
Step 2 - Define Foundation Model
- In the first block - Foundation Model, select the Foundation Model that you wish to use and Type of prediction task. Please refer to documentation for more information about types of prediction tasks.
- Select
QuickstartFoundation model that we have trained in the previous step - Select
Classification - Multilabelfrom drop down list. Your configuration should look like this:
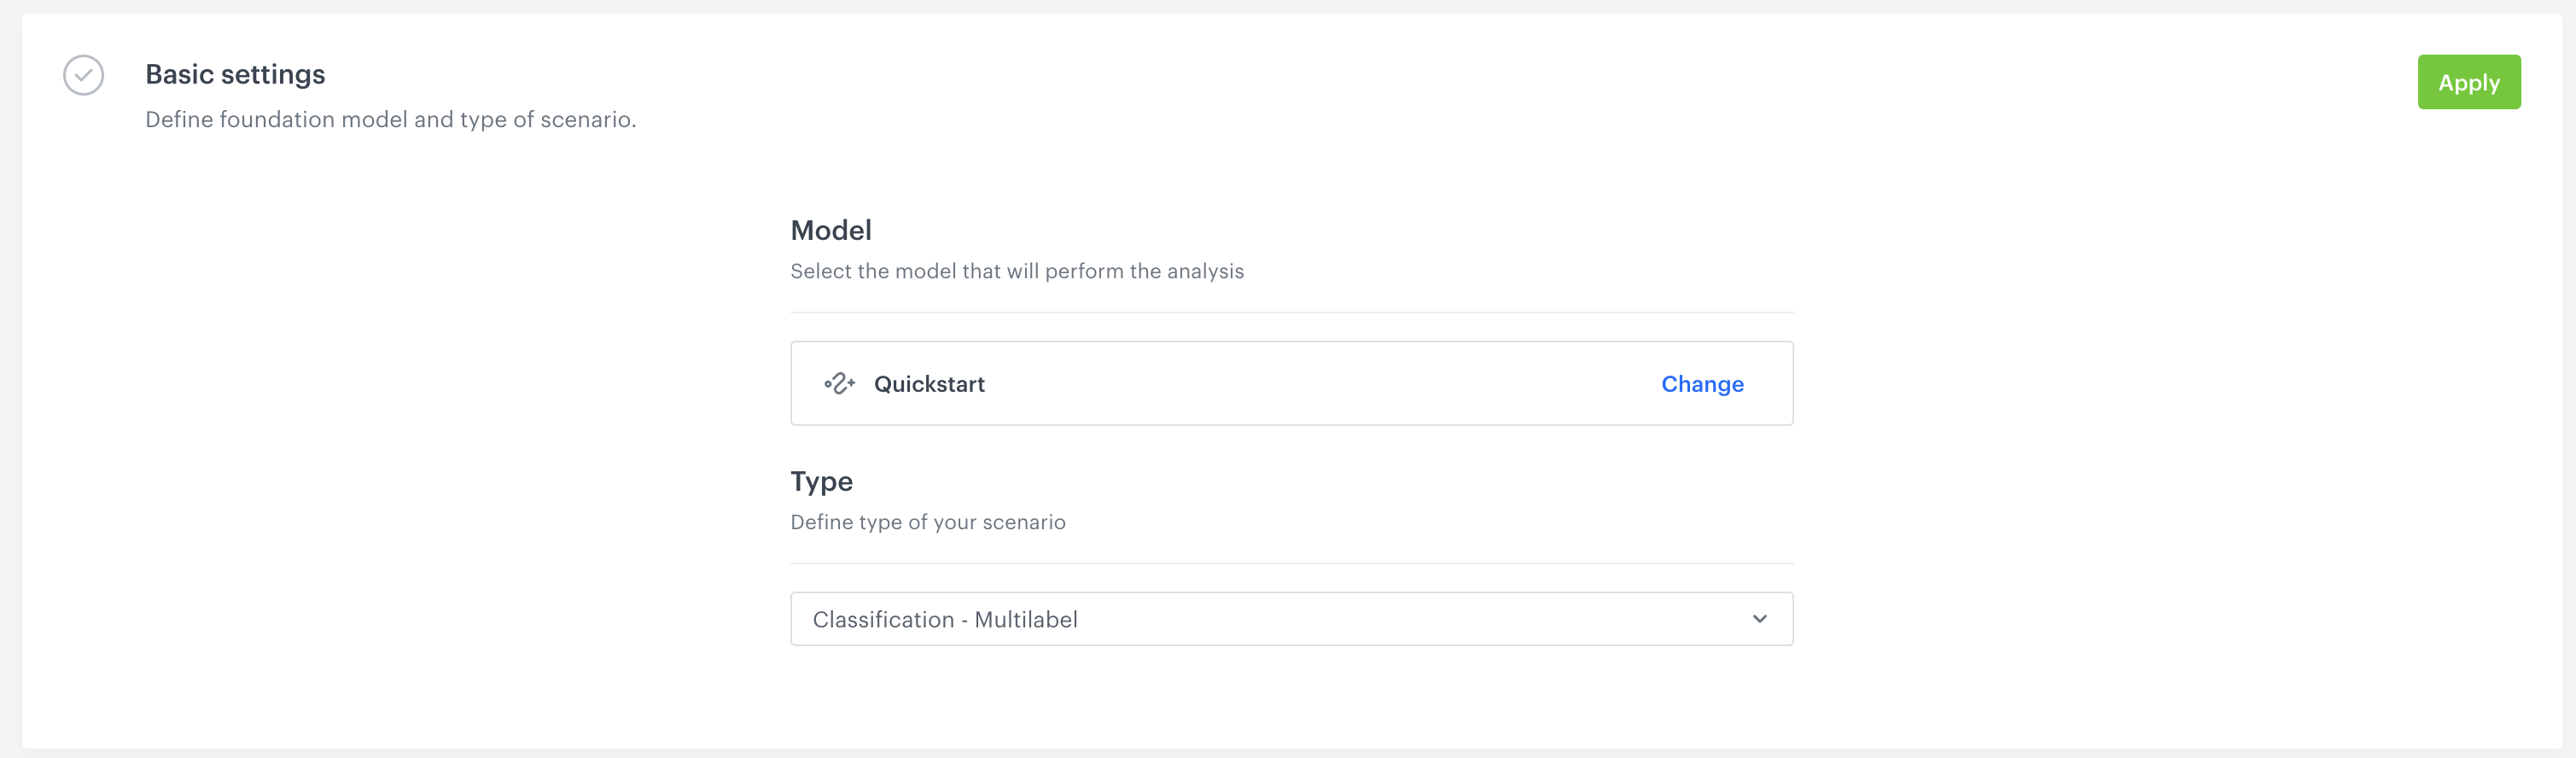 4. Click Apply in the upper right-hand side.
Step 3 - Prepare Target function
The next step is to prepare target function. This step is exactly the same as for the Docker version. There are 2 important resources for this section:
- Recipes - a collection of use cases of target functions with step-by-step explanation of each line of code
- Modeling Target function section from main documentation.
Explore more target functions
The example below is adapted from the Category Purchase Propensity recipe. For more target function patterns — including churn prediction, spend forecasting, and product recommendations — check out the Recipes section.
For the purpose of this exercise:
- Copy-Paste the following code:
def category_propensity_target_fn(
    history: target_function.Events,
    future: target_function.Events,
    attributes: target_function.Attributes,
    ctx: Dict,
) -> np.ndarray:
    """Score propensity to buy in each H&M product group (1 = bought, 0 = did not)."""

    # === Configuration ===
    TARGET_WINDOW_DAYS = 21
    PURCHASE_DATA_SOURCE = "Tr"
    TARGET_CATEGORIES = [
        "Garment Upper body",
        "Garment Lower body",
        "Garment Full body",
        "Accessories",
        "Underwear",
        "Shoes",
        "Swimwear",
        "Socks & Tights",
        "Nightwear",
    ]

    # Category column lives in the Articles data source
    CATEGORY_COLUMN = target_function.get_qualified_column_name(
        column_name="product_group_name",
        data_sources_path=["Ar"],
    )

    # 1. Ensure the training window is long enough
    target_window = timedelta(days=TARGET_WINDOW_DAYS)
    if target_function.has_incomplete_training_window(ctx, target_window):
        return None

    # 2. Trim future events to the target window
    future = future.interval_from(ctx[target_function.SPLIT_TIMESTAMP], target_window)

    # 3. Check which categories the customer purchased from
    category_labels, _ = (
        future[PURCHASE_DATA_SOURCE]
        .groupBy(CATEGORY_COLUMN)
        .exists(groups=TARGET_CATEGORIES)
    )

    # 4. Exclude customers with no purchases in any target category
    if category_labels.sum() == 0:
        return None

    return category_labels
- Click
Apply
Step 4 - Define Audience and Schedule
Next we can refine the audience in the Audience filter block - for this tutorial we skip this option as we want to train our model on all existing data.
- Finally we need to define schedule. Let's select
One-time trainingandStart immediatelyin the options and then clickApply - Now you are ready to hit
Run Modelbutton and start training your first Downstream Model!
You are now ready to generate the predictions, please move to the next section for that.