
Creating Foundation Model
Interface Overview: Create Model in BaseModel
The Create Model interface in BaseModel is designed to guide users through the process of building a new model. This interface allows users to select data sources, define audience filters, set schedules, and more. Below is a breakdown of each section within the interface:
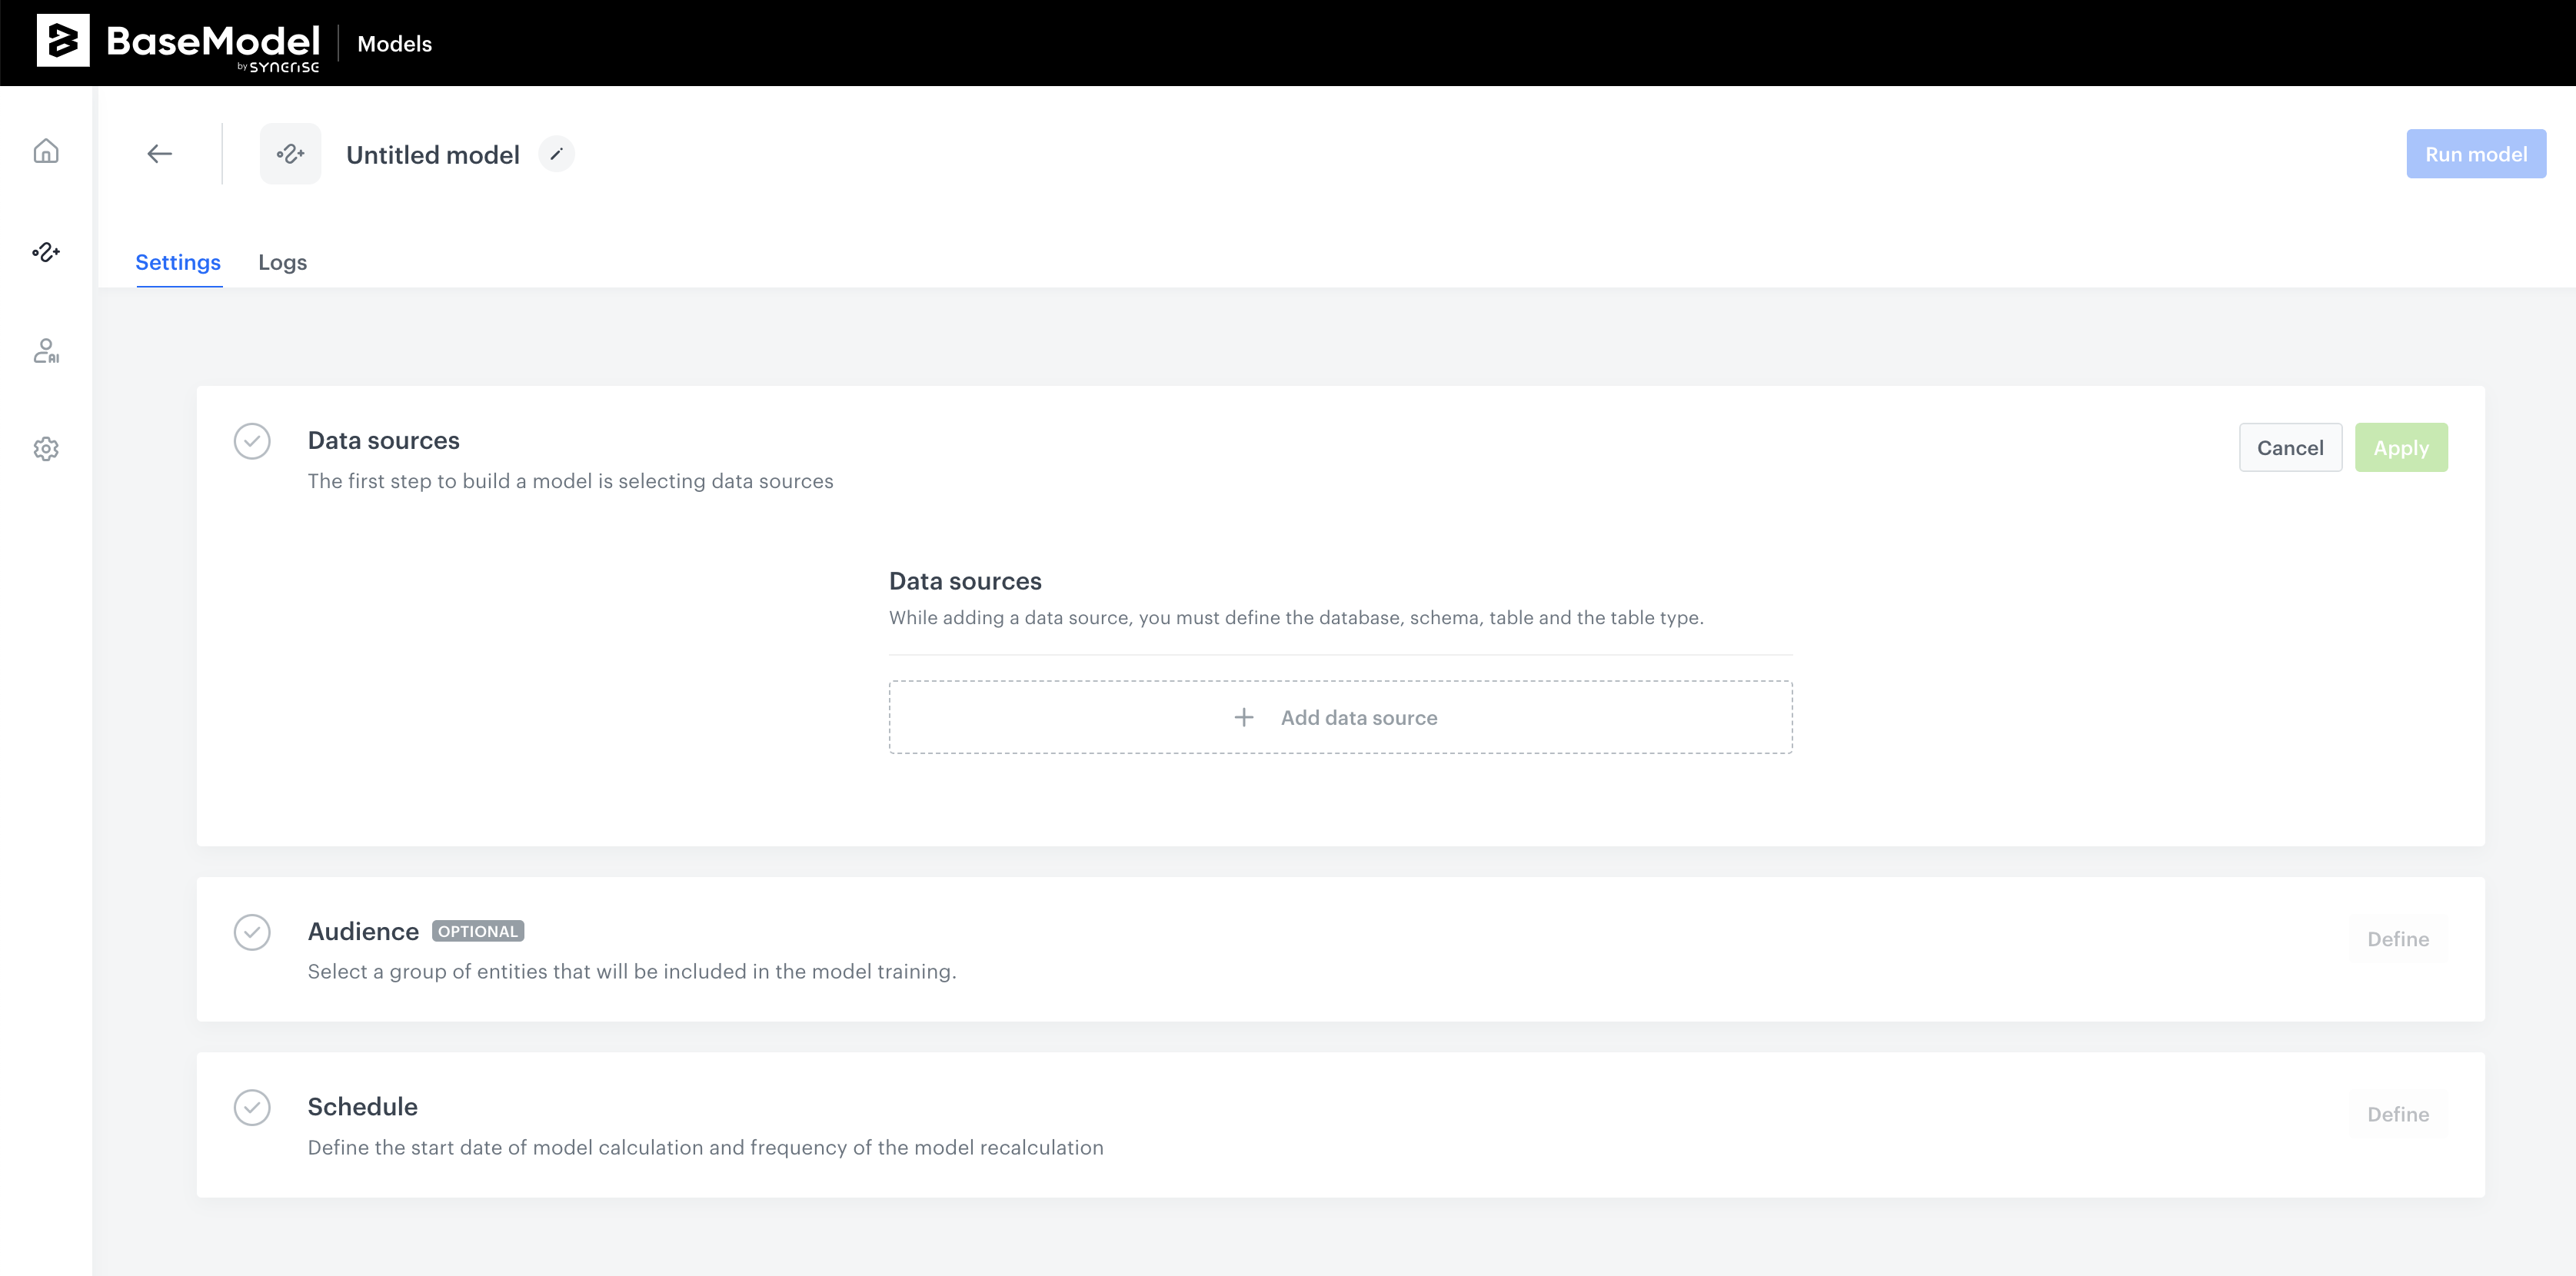
1. Data Sources
Purpose:
The first step in building a model is to select the data sources that will be used. More information about this part can be found in Defining Data Sources section.
Key Components:
- Data Sources Selection: Here, you can add data sources by defining the database, schema, table, and table type. Click the Add data source button to start this process.
Note: It is essential to add at least one data source before proceeding to other settings.
Once the data sources are added, click the Apply button to save the configuration.
2. Audience (Optional)
Purpose:
Define the group of entities that will be included in the model training.
Key Components:
- Audience Filter: This section allows you to apply filters that define conditions an entity must meet to be included in the model. Use the Define filter button to create these conditions.
Note: You must declare data sources before defining audience filter settings. If this step is skipped, a warning message will be displayed.
After defining the audience filter, click Apply to save your settings.
3. Schedule
Purpose:
Set the schedule for when the model will be calculated and how often it will be recalculated.
Key Components:
-
Frequency:
- One-time Training: This option allows for a single set of results, ideal for a model quality test or one-off scenario.
- Continuous Training: This option enables ongoing recalculation of the model, reflecting the most recent changes to the audience or other criteria. Continuous training can be stopped by deactivating the model.
-
Start:
- Start Immediately: Begin the model calculation as soon as the configuration is complete.
- Schedule Start: Set a specific date and time to begin the model calculation.
Click Apply after configuring the schedule.
4. Run Model
Purpose:
Once all configurations are complete, this option allows you to execute the model training based on the settings defined in the previous steps.
5. Logs
For more details about logs, please refer to Logs section.