
Defining Data Sources
Edit Data Sources
The Edit Data Sources interface in BaseModel is a crucial step in defining the input data for model creation. This interface allows users to select and configure the data sources that will be used during the model training process. Below is a detailed breakdown of the key components of this interface:
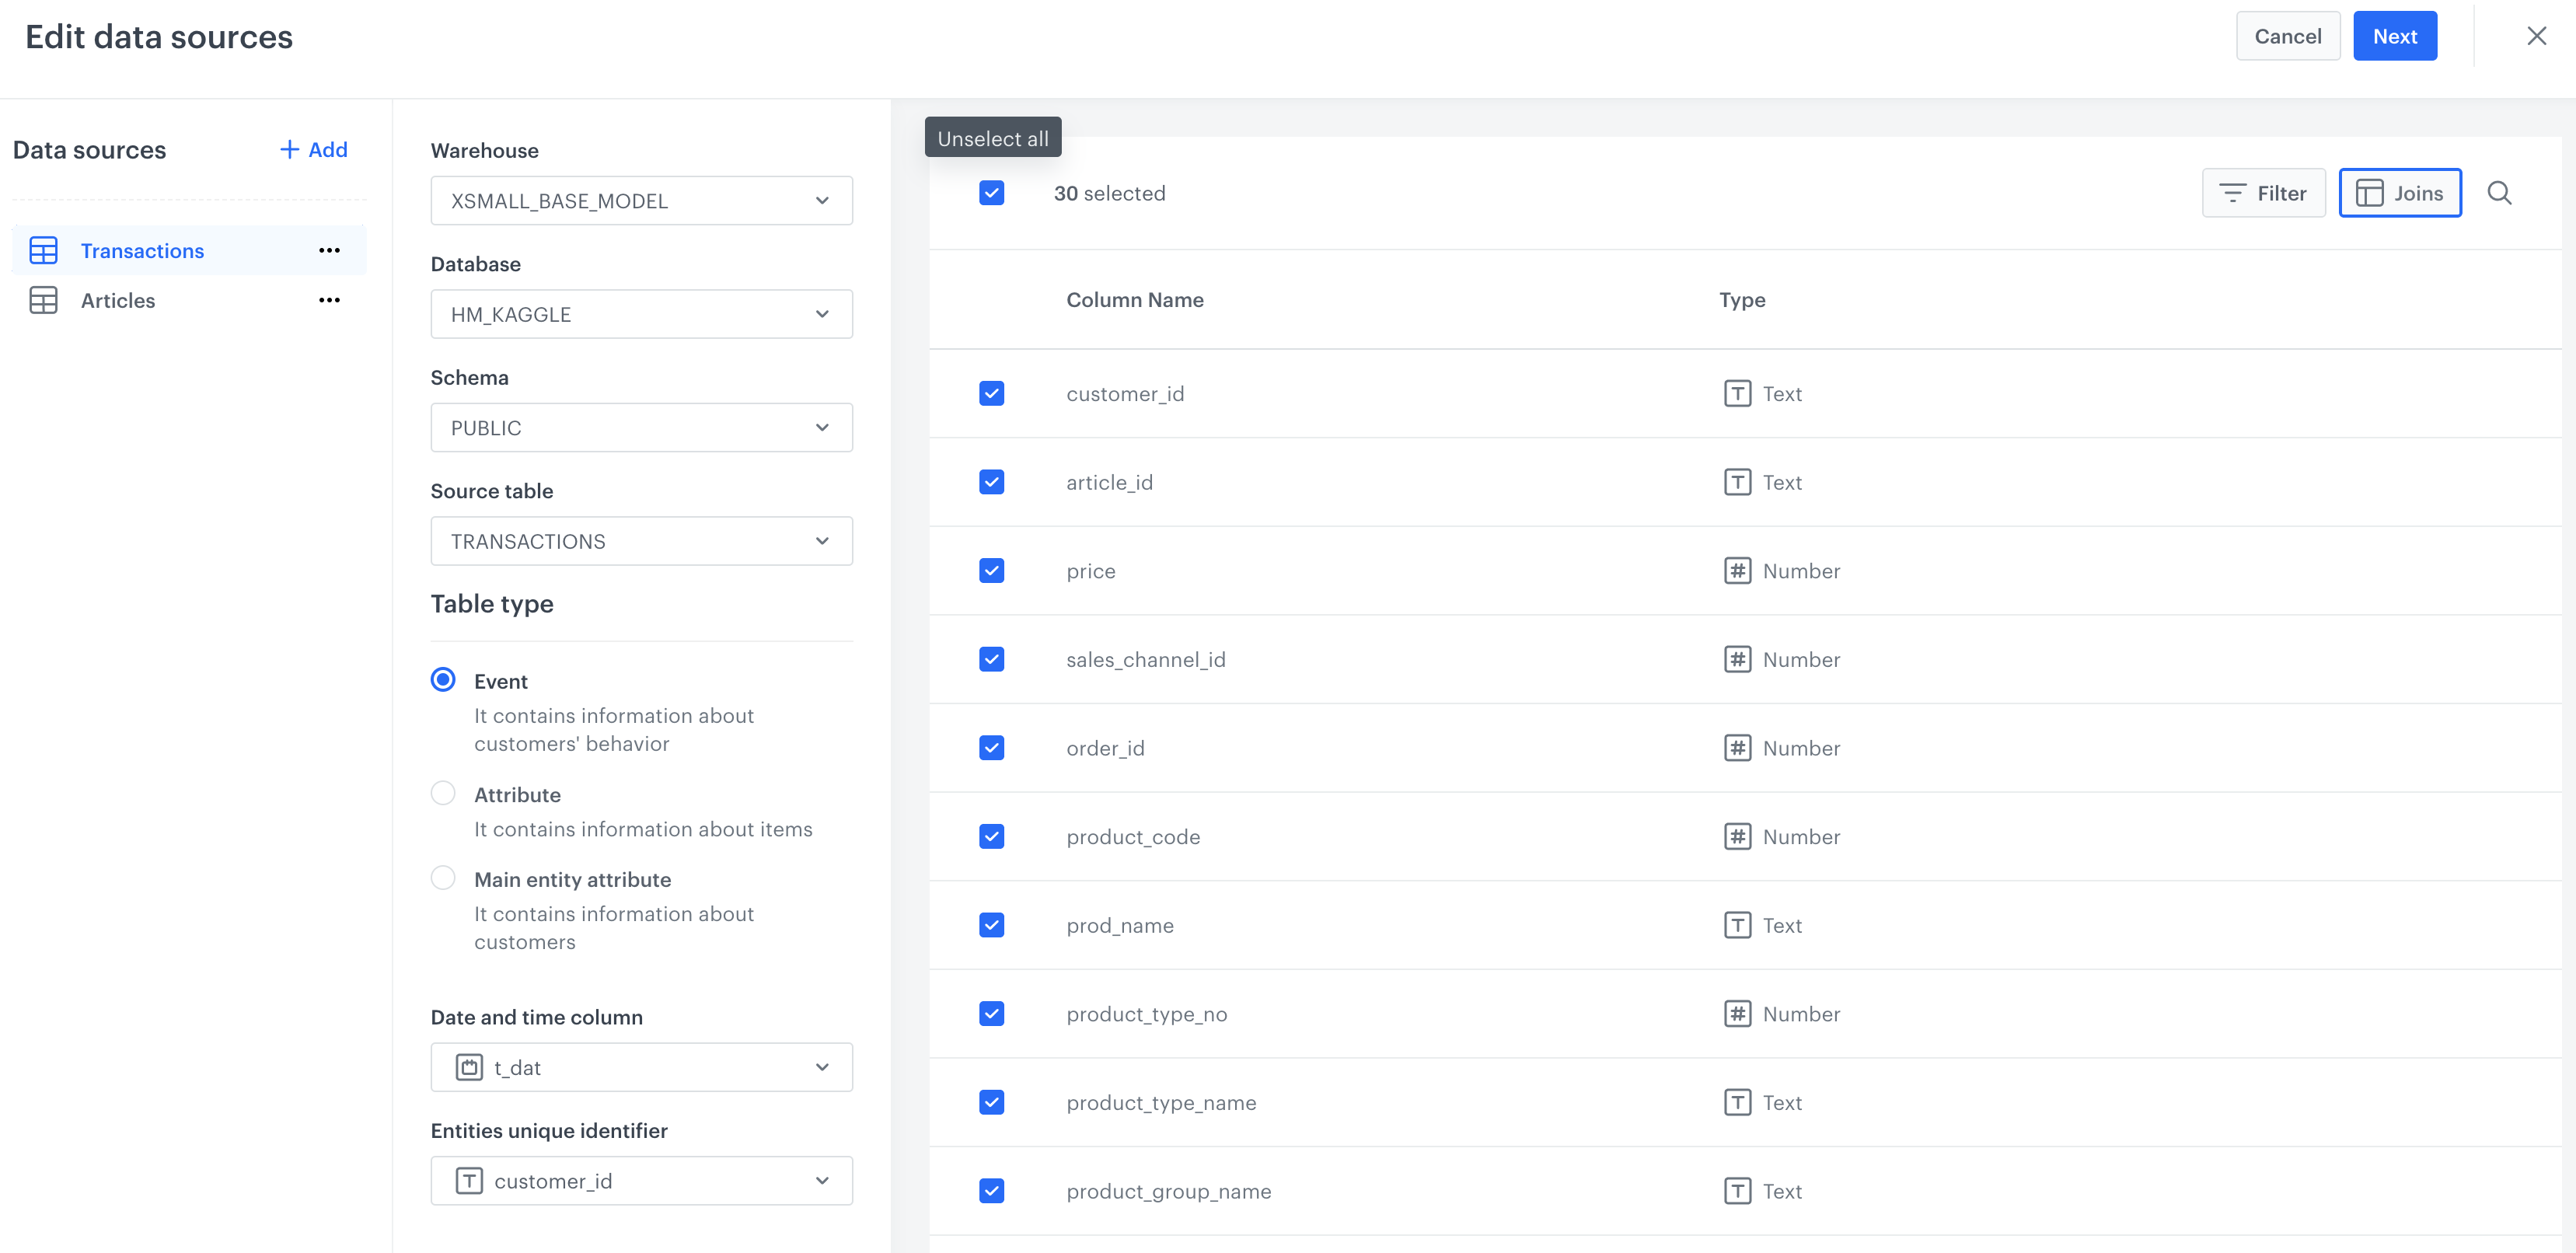
1. Data Sources Selection
Purpose:
Select and configure the data sources that will feed into your model.
Key Components:
- Data Sources Panel (Left Sidebar):
- Add Data Source: Click the + Add button to include additional data sources. Each data source added will be listed in this panel.
- Selected Data Source: The currently selected data source (e.g., "Transactions") is highlighted. You can switch between data sources if multiple are added.
2. Data Source Configuration
Purpose:
Define the details and structure of the selected data source.
Key Components:
-
Warehouse: Select the data warehouse from the dropdown menu.
-
Database: Choose the specific database that contains your data.
-
Schema: Select the schema within the chosen database.
-
Source Table: Choose the table that contains the data you want to use.
-
Table Type: Define the type of table:
- Event: Contains information about customer behavior.
- Attribute: Contains information about items.
- Main Entity Attribute: Contains information about customers.
-
Date and Time Column: Specify the column that holds date and time information (e.g., "t_dat").
-
Entities Unique Identifier: Select the column that uniquely identifies entities within the data (e.g., "customer_id").
3. Column Configuration
Purpose:
Select and configure the columns from the source table that will be used in the model.
Key Components:
- Column List: The interface displays a list of columns from the selected table, showing their names and data types (e.g., "Text," "Number").
- Column Selection: Check or uncheck the boxes next to each column name to include or exclude them from the model.
- Filter and Joins: Use these options to apply filters or join conditions to refine the data further.
4. Navigation and Actions
Key Components:
- Cancel Button: Click this to discard any changes and exit the interface without saving.
- Next Button: Once you have configured the data source and selected the columns, click Next to proceed to the next step in the model creation process.
5. Configuring Joins
The Joins Columns interface in BaseModel allows users to define relationships between different data tables by specifying how columns from these tables should be joined. This is a crucial step when combining data from multiple sources to ensure that the model has access to all relevant information.
You can read more about joins in the main section of the documentation here.
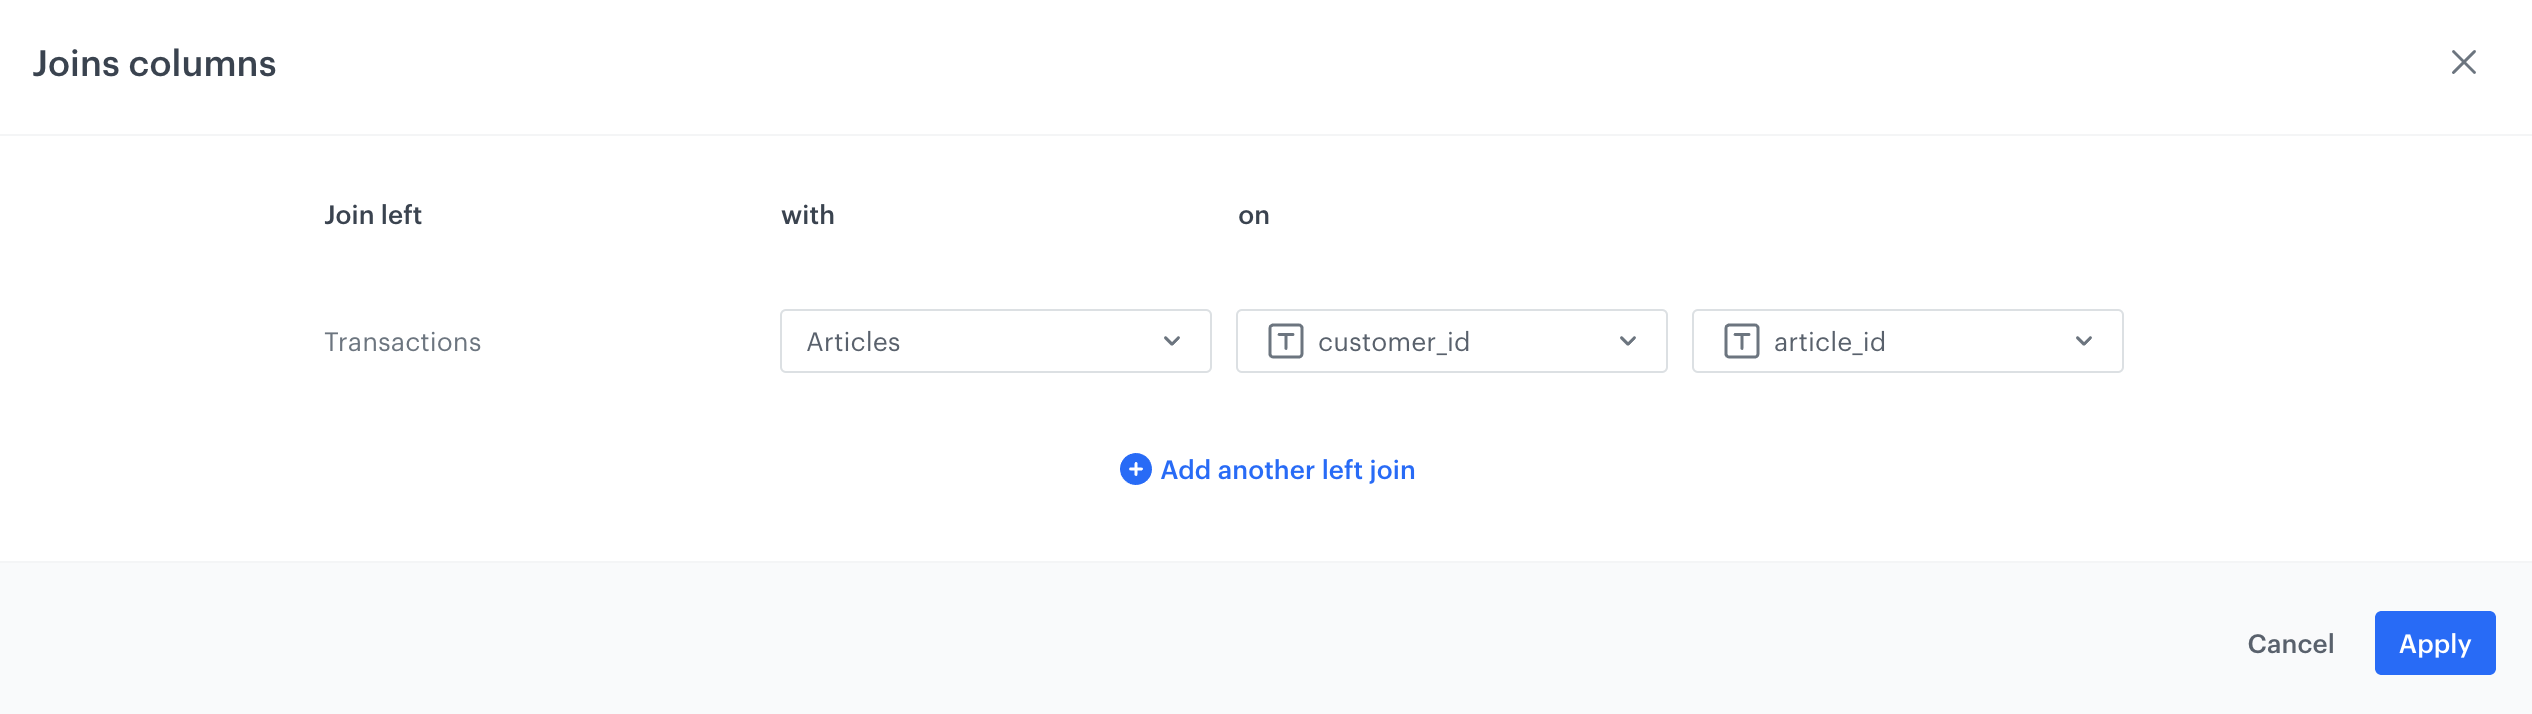
Purpose:
Define how to join columns from different tables to create a comprehensive dataset for your model.
Key Components:
-
Join Left: The base table from which the join operation will start. In this case, the table is "Transactions."
-
With: The table that will be joined to the base table. In this example, the "Articles" table is selected.
-
On: Specifies the columns on which the join will be performed:
- Left Column: The column from the base table ("Transactions"), selected as "customer_id."
- Right Column: The corresponding column from the joined table ("Articles"), selected as "article_id."
-
Add Another Left Join: Click this option to add more join conditions if you need to join additional tables or create more complex relationships.
5. Logs
For more details about logs, please refer to Logs section.
Updated 12 months ago